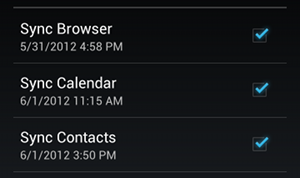
Checkboxes allow the user to select one or more options from a set. Typically, you should present each checkbox option in a vertical list.

To create each checkbox option, create a CheckBox in your layout. Because a set of checkbox options allows the user to select multiple items, each checkbox is managed separately and you must register a click listener for each one.
Responding to Click Events
When the user selects a checkbox, the CheckBox object receives an on-click event.
To define the click event handler for a checkbox, add the android:onClick attribute to the <CheckBox> element in your XML layout. The value for this attribute must be the name of the method you want to call in response to a click event. The Activity hosting the layout must then implement the corresponding method.
For example, here are a couple CheckBox objects in a list:
<?xml version="1.0" encoding="utf-8"?>
<LinearLayout xmlns:android="http://schemas.android.com/apk/res/android"
    android:orientation="vertical"
    android:layout_width="fill_parent"
    android:layout_height="fill_parent">
    <CheckBox android:id="@+id/checkbox_meat"
        android:layout_width="wrap_content"
        android:layout_height="wrap_content"
        android:text="@string/meat"
        android:onClick="onCheckboxClicked"/>
    <CheckBox android:id="@+id/checkbox_cheese"
        android:layout_width="wrap_content"
        android:layout_height="wrap_content"
        android:text="@string/cheese"
        android:onClick="onCheckboxClicked"/>
</LinearLayout>
Within the Activity that hosts this layout, the following method handles the click event for both checkboxes:
public void onCheckboxClicked(View view) {
    // Is the view now checked?
    boolean checked = ((CheckBox) view).isChecked();

    // Check which checkbox was clicked
    switch(view.getId()) {
        case R.id.checkbox_meat:
            if (checked)
                // Put some meat on the sandwich
            else
                // Remove the meat
            break;
        case R.id.checkbox_cheese:
            if (checked)
                // Cheese me
            else
                // I'm lactose intolerant
            break;
        // TODO: Veggie sandwich
    }
}
The method you declare in the android:onClick attribute must have a signature exactly as shown above. Specifically, the method must:
Tip: If you need to change the radio button state yourself (such as when loading a saved CheckBoxPreference), use the setChecked(boolean) or toggle() method.
